iOS updates can be incredibly exciting. Not only do they come with amazing features that improve the functionality of your iPhone, but most incremental updates also contain loads of fixes that resolve known bugs and issues.
That isn’t the case with the beta versions of iOS, however. They often break down key features, prevent apps from running properly, or cause battery-related problems. On rare occasions, you may experience that with stable iOS releases as well.

If you’ve exhausted all other troubleshooting options (have you tried resetting your iPhone yet?), then downgrading iOS is a likely move that can help.
How Downgrading iOS Works
Depending on whether you’re on the beta or the stable channel of iOS, here’s how downgrading the iPhone’s system software works:
- You can downgrade from a beta release of iOS to the most recent—and stable— version of the system software by restoring your iPhone in recovery mode. It’s not complicated and you can do that whenever you want.
- You can downgrade from a stable release of iOS to another stable version by restoring your iPhone with an IPSW (iPod Software) file. Apple stops ‘signing’ (or authenticating) older iOS versions within a few days or weeks of a new release. In most cases, that makes it impossible to go back to anything other than the previous iteration of the system software. If you miss the time window, you can’t downgrade.
Downgrading an iPhone (from a beta or a stable release) will also erase all your data. That includes apps, settings, documents, photos, messages, contacts, and so on.

If you have an iCloud or a Finder/iTunes backup from the same (or an earlier) iOS version that you are about to downgrade to, you can get your data back by restoring from it afterward. You can also retrieve certain forms of synced data to iCloud—such as photos and messages—simply by signing in with your Apple ID.
However, a downgraded iPhone will not accept a backup created on newer versions of iOS. For example, you can’t use an iCloud or Finder/iTunes backup from iOS 14.3 to restore your data on iOS 14.2. Nor can you use backups from the beta release of iOS 14.4 on a stable release of iOS 14.3.
If you don’t have any older backups, the only way to get your data back is to create a new Finder/iTunes backup and use a workaround that involves editing the backup’s PLIST file. You can read all about it further below. That said, we do not accept any responsibility if you end up losing your data.
How to Downgrade iOS Beta to iOS Stable
Downgrading an iPhone from a beta release to a stable version of iOS (such as from iOS 14.0 beta to iOS 13.7 or iOS 14.4 beta to iOS 14.3) is quite straightforward. You can’t pick the version that you want to downgrade to, however.
1. Connect your iPhone to your PC or Mac via USB.
2. Open Finder or iTunes and select your iPhone.
3. Force-restart your iPhone and enter recovery mode.
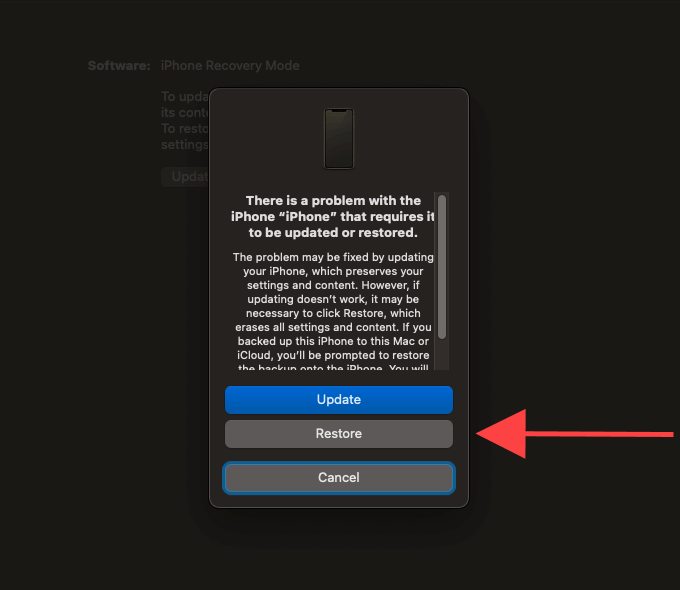
4. Select Restore in Finder or iTunes.

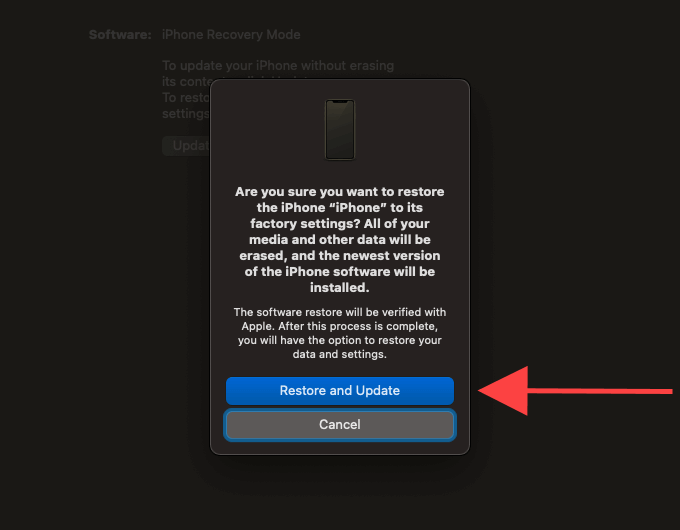
5. Select Restore and Update to confirm that you want to go ahead.

6. Agree to the license terms.
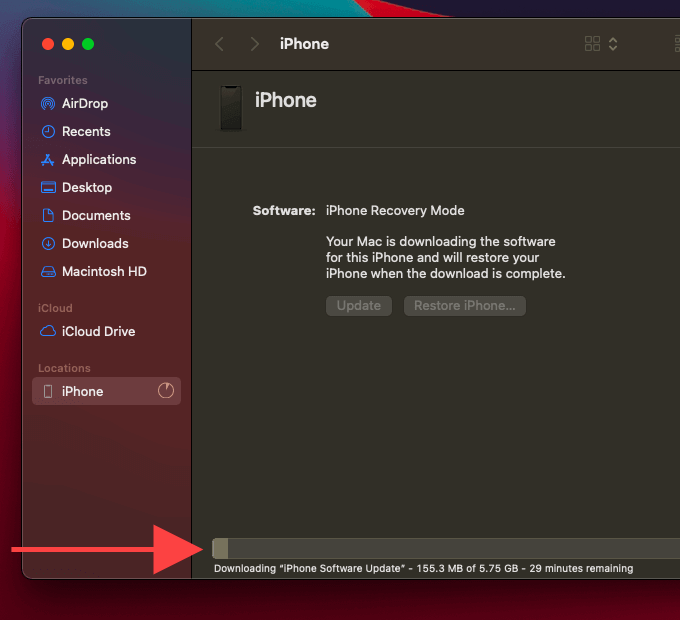
7. Wait for Finder/iTunes to finish downloading the stable version of iOS to your Mac or PC. Depending on the speed of your internet connection, it may take several minutes to an hour to complete.

Important: If your iPhone exits recovery mode during the download (which it automatically will after 15 minutes), just wait for the download to complete and put it back into recovery mode. Then, repeat steps 4–6.
After Finder/iTunes finishes downloading the update file, your Mac or PC will automatically begin to restore your iPhone. Once you receive a “Your iPad has been restored to factory settings…” message, select OK. However, do not disconnect until you see the “Hello” screen on the iPhone.
How to Downgrade iOS Stable to a Previous Stable Version
Downgrading an iPhone from a stable version to an earlier stable build can be slightly complicated. For starters, you must download a signed version of the system software IPSW file using your Mac or PC. You must then use Finder/iTunes to restore your iPhone from the downloaded file.
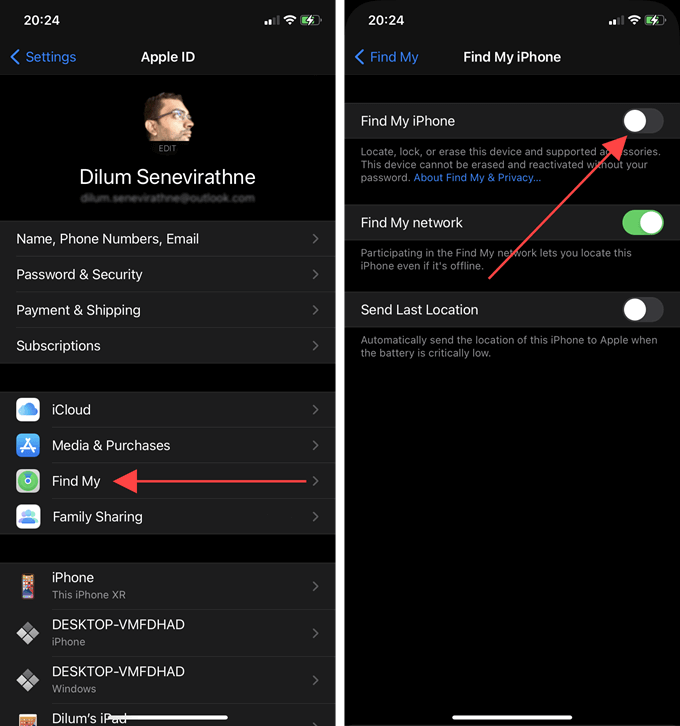
1. Open the Settings app on your iPhone. Then, go to Apple ID > Find My > Find My iPhone and disable Find My iPhone.

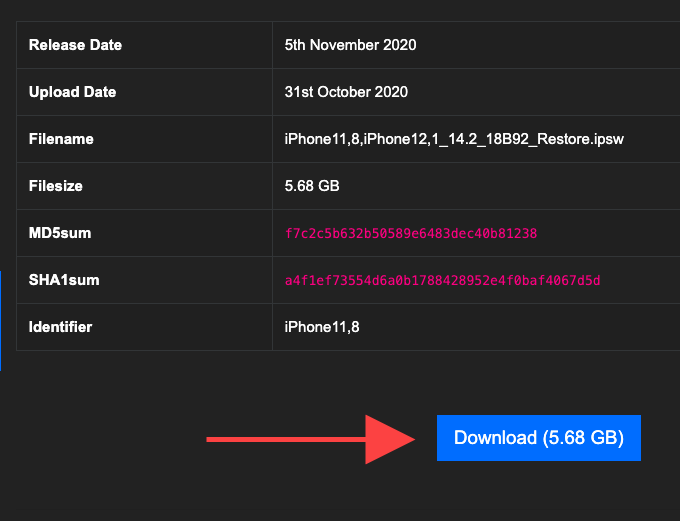
2. Head over to IPSW.me on your Mac or PC.
3. Select your iPhone model. Then, select the signed version of iOS that you want to downgrade to. If you don’t see a signed release (other than the version that you’re currently on), you can’t downgrade.
4. Download the IPSW system software file.

5. Connect your iPhone to your computer or Mac over USB.
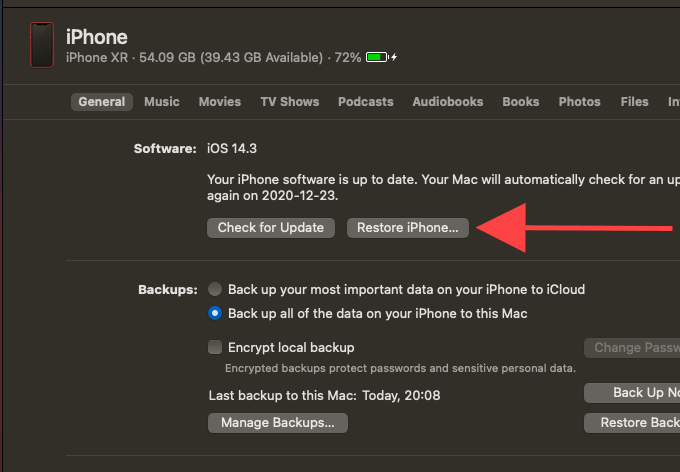
6. Open Finder or iTunes and select your iPhone.
7. Hold down Option (Mac) or Shift (PC) and select the Restore iPhone button.

8. Select the downloaded IPSW file. Then, select Open.

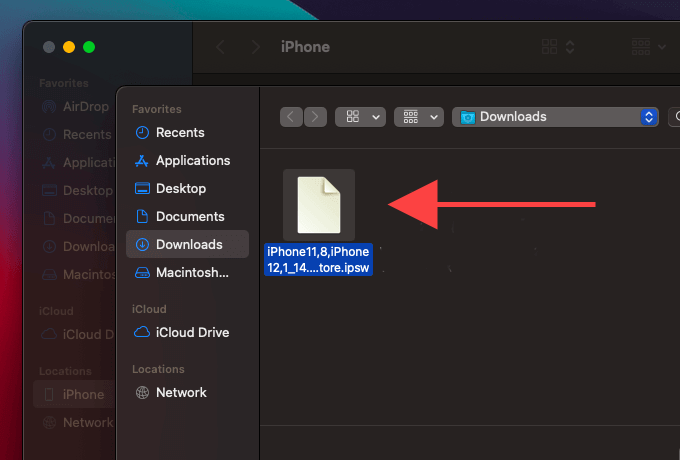
9. Select Restore.

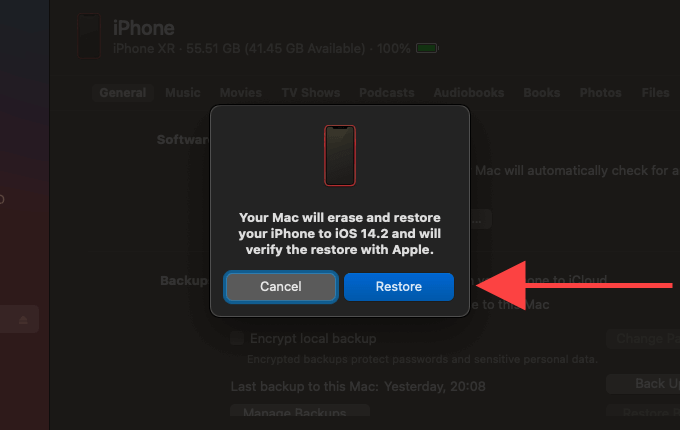
Your Mac or PC will start to downgrade your iPhone immediately. Select OK once you come across the “Your iPad has been restored to factory settings…” pop-up message. However, do not disconnect your iPhone until you see the “Hello” screen.
How to Restore Your Data From an iCloud or Finder/iTunes Backup
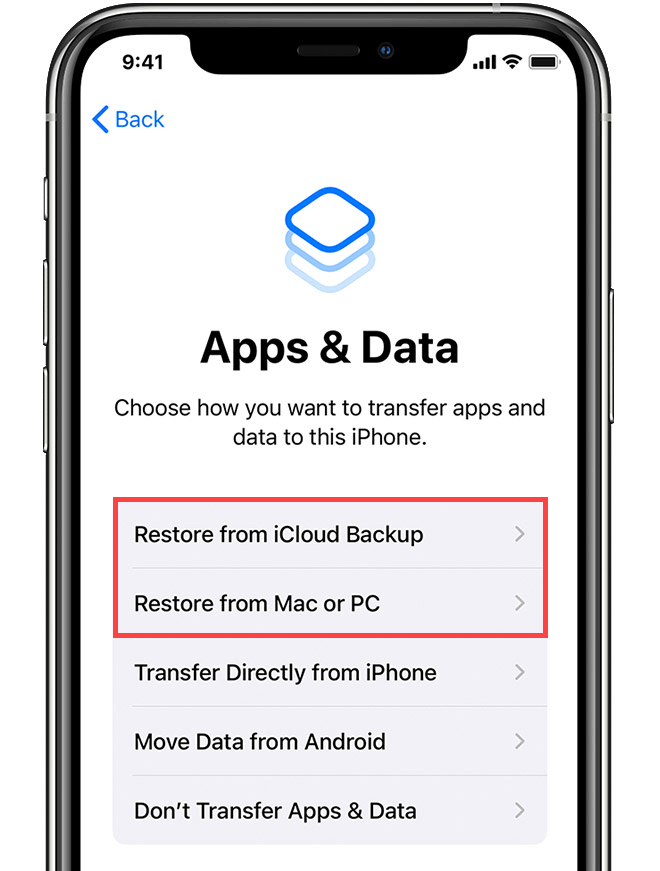
After downgrading iOS, you can restore your data using a compatible iCloud or Finder/iTunes backup. While setting up your iPhone, select Restore from iCloud Backup or Restore from Mac or PC on the Apps & Data screen and follow all on-screen instructions to get your data back.

Since you can’t restore your data using an iCloud or a Finder/iTunes backup created on a newer version of iOS, the following workaround should help you out. However, it’s limited to Finder/iTunes backups only.
1. Download a PLIST editor for your Mac or PC. Here are a couple of suggestions:
Mac: BBEdit
PC: plist Editor Pro
2. Go to the folder that contains the Finder/iTunes backup on your computer.
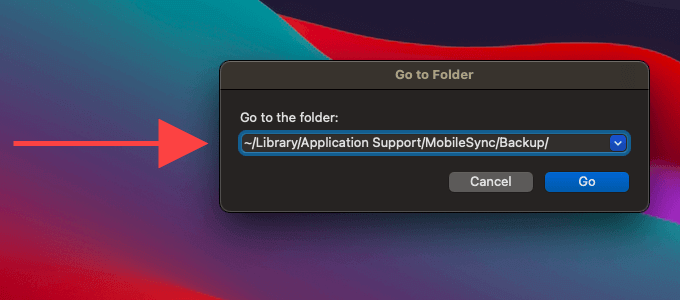
Mac: Open Finder, press Command+Shift+G, copy the path below, and select Go:
~Library/Application Support/MobileSync/Backup

PC: Press Windows+R to open Run, copy the path below, and select OK:
%USERPROFILE%/Apple Computer/MobileSync/Backup
If the directory doesn’t exist, use the following path instead:
%APPDATA%/Apple Computer/MobileSync/Backup
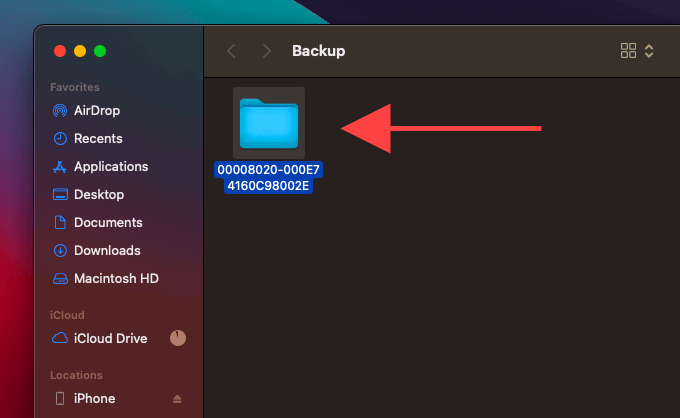
3. Select the iPhone backup folder.

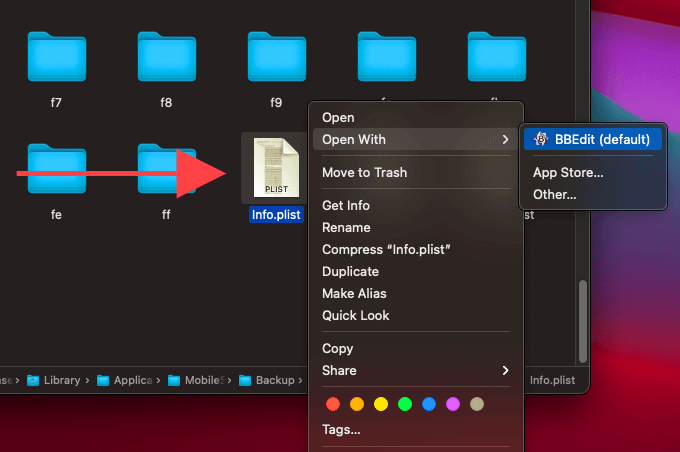
4. Locate and open Info.plist in a PLIST editor.

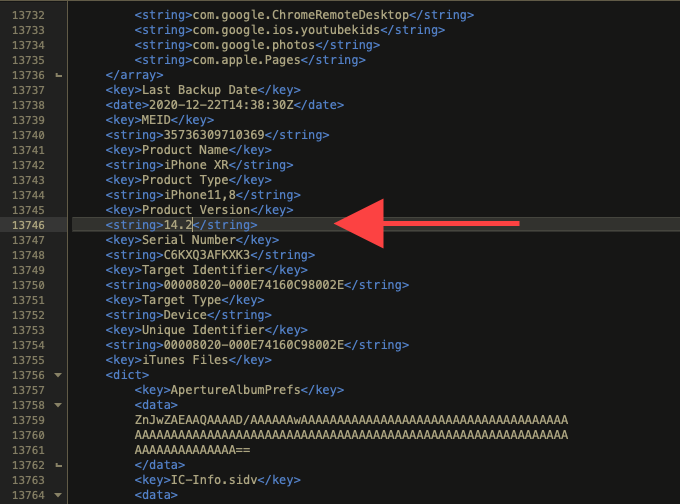
5. Locate the line labeled Product Version. Press Cmd+F or Ctrl+F and use the PLIST editor’s Find functionality to get to the line faster.
6. Under the Product Version line, replace the iOS version number with that of the downgraded iOS release. For example, if you just downgraded to iOS 14.2, add that as the version number.

7. Press Cmd+S or Ctrl+S to save the change. Then, exit the PLIST editor.
You can now restore from the backup. Go back to iTunes or Finder. Then, select your iPhone, pick the backup using the menu next to Restore from this backup, and select Continue.
How Did It Go?
Downgrading iOS isn’t hard. You just have no choice over the version that you want to downgrade to. Still, there’s no reason to do that in the first place unless you keep running into serious issues on your iPhone. Only perform a downgrade as a last resort.
If you have any questions, drop in a comment and we’ll try our best to help you out.